secure comfort

Setup Instruction

For Secure Comfort Application

Integrated Wifi App

Search for the "Secure Comfort" app on your app store

SETUP INSTRUCTIONS

For IOS:
https://apps.apple.com/us/app/secure-comfort/id1582210299
Android:
https://play.google.com/store/apps/details?id=com.SmrtBlkt1.smart

  • 1.Create an account or log in to the app.
  • 2.Connect the controller to the blanket, and then plug it into a wall outlet. With the controller off, hold the right (High) button until the display shows "Cr." The device is now ready for pairing.
  • 3.Select "Home" at the bottom of the screen. Tap the "+" icon, then select "Add device." Allow the app the permissions it is requesting. Next, select "Add" next to discovering devices. Let the app search for the device; do not try to add a device manually. If you receive a timeout error, please refer to the troubleshooting section below.
  • 4.When prompted, select "Manual input" and enter your Wi-Fi router name and password. Note: Your phone must be connected to the same Wi-Fi network you are using for the blanket controller.
  • 5.Select the device to add and tap "Next."
  • 6.Select "Done."
  • 7.Open the app and give a name to the blanket. See the details below on how to name your blanket.
  • 8.Use the pencil icon to open the edit screen. Select and change the name as needed.
  • 9.For Queen and King sizes, repeat steps 3 through 8 for the other controller.

Please note that only one digital device/app can be connected to a controller at a time.

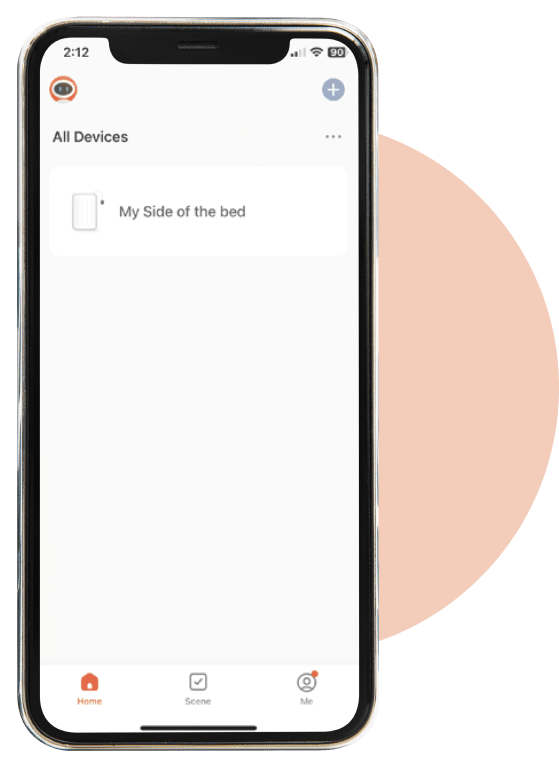
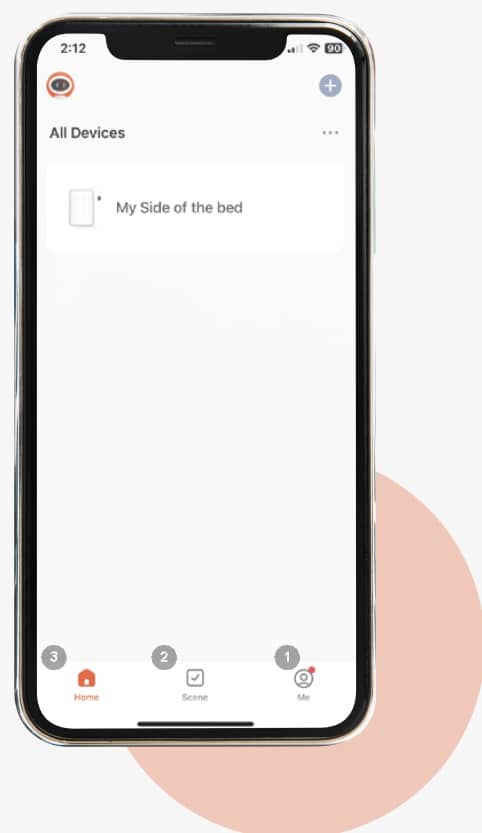
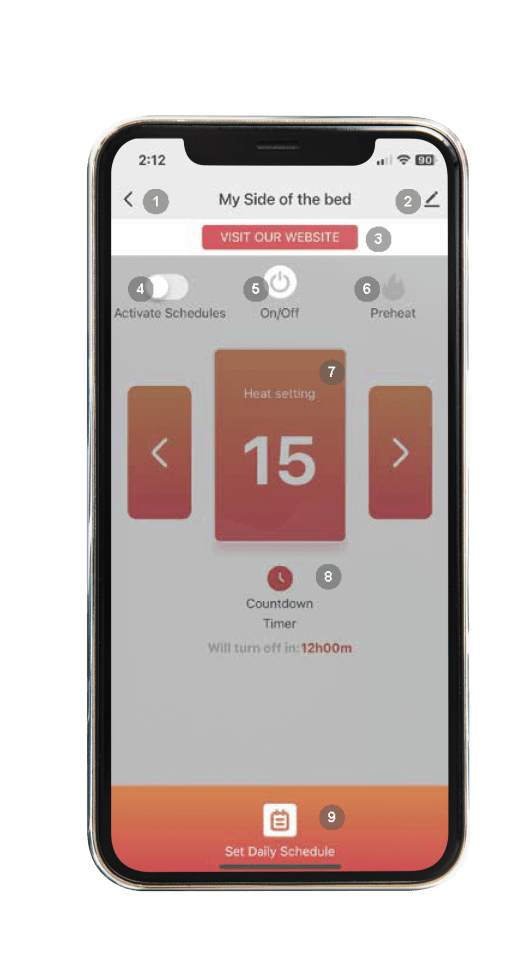
To change the device name, follow these steps:

  • 1.Select the device you want to change.
  • 2.Use the pencil icon to open the edit screen.
  • 3.Tap the pencil edit icon again on the device you are changing.
  • 4.Select "Name" and change it as needed.

To check the controller/device status, press the center button quickly to display the device status. Here are the possible status codes and their meanings:

  • • "S0": Device is reset and waiting to connect.
  • • "S4": Device is connected to Wi-Fi.

Please note that this device operates only on 2.4GHz Wi-Fi router bands with IEEE 802.11 B/G/N compatibility. Ensure that your Wi-Fi signal is on the 2.4GHz frequency.

For troubleshooting, consider the following steps if you encounter issues:

  • 1.Make sure your phone is connected to the same Wi-Fi network you are setting the controller up on.
  • 2.Confirm that your Wi-Fi network is operating on the 2.4GHz frequency. Check your modem/router manual or contact your internet provider for assistance.
  • 3.Ensure that the controller is in pairing mode by holding the right (High) button until the display shows "CR".

If you receive a "Device adding timeout" or "Failed to Connect to the router" error during setup, it could be due to an incorrect network name or password entered.

SETUP INSTRUCTIONS
  • 1. Create an account or log in to the app.
  • 2. Connect the controller to the blanket, and then plug it into a wall outlet. With the controller off, hold the right (High) button until the display shows "Cr." The device is now ready for pairing.
  • 3. Select "Home" at the bottom of the screen. Tap the "+" icon, then select "Add device." Allow the app the necessary permissions.
Alexa Commands

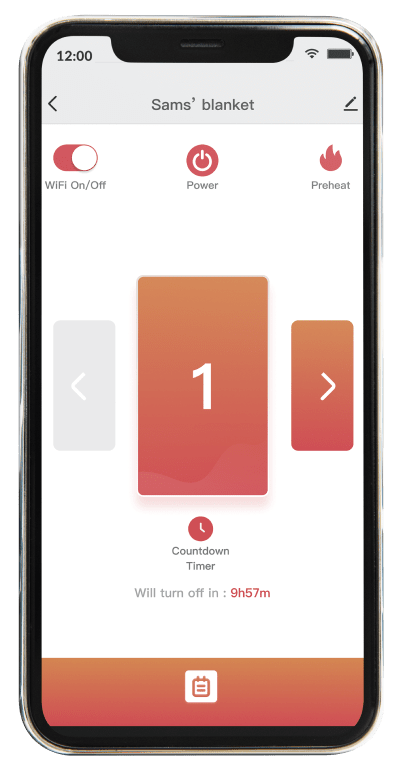
    • Commands include: “Turn <device name> On”.
    • “Turn <device name> Off”.
    • “Turn <device name> to (1-20).
    • “Turn <device name> Preheat On”.
    • “Turn <device name> Preheat On”.
    • “Turn <device name> Down”.
    • “Turn <device name> Up”.
    • The Device name set in the app will be used during commands.
    • Temperature settings must be from 1-20.

SETUP INSTRUCTIONS

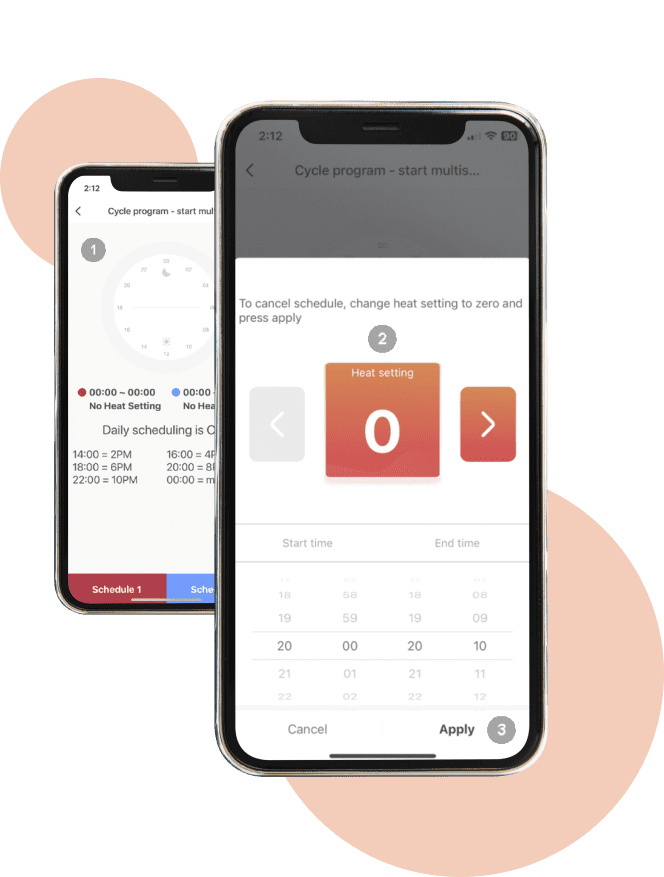
If you have a queen or king-sized blanket, there will be two controllers connected. One digital device/app can operate both controllers. However, please note that only one digital device/app can be connected to a heated controller at a time. Therefore, if two people are sharing a queen or king-sized blanket, it is recommended that each person sets up their portion of the blanket separately using their own digital device/app.

  • 1 This allows you to change personal info and also for the setup of Alexa and Google Assistant voice commands.
  • 2This button is only of use if you have other Tuya devices setup in your home.
  • 3 This button returns you to the home screen.
SETUP INSTRUCTIONS
  • 1 Returns you to the home page.
  • 2Allows you to change the name of your blanket.
  • 3Link to the Secure Comfort website.
  • 4This button activates or deactivates your schedules. If this is switched off, your schedules will NOT take effect.
  • 5This button powers the blanket on or off.
  • 6The preheat shortcut turns the power onto high for 1 hour.
  • 7The main controls. Allows you to adjust the temperature setting.
  • 8Allows you to adjust the countdown timer so it automatically turns off. This is most often used for people who do not want to set daily schedules.
  • 9 This button links to the schedule page.
SCHEDULE FUNCTIONALITY
  • 1 This is the schedule display page. Note that all times are in Military Standard Time and follow the time that your phone is currently set to. In order for a schedule to work, the 'activate schedules' button on the previous screen must be switched to the ON position. Click on the “schedule 1” or “schedule 2” button to set your schedules.
  • 2This is the schedule setup page. Simply enter your heat level, start and stop times, and hit “apply”. You may setup to two schedules at a time. The timing of these schedules cannot overlap. One advantage of having two schedules is that you can preheat your bed for a short period of time and then lower the temperature to maintain the desired heat. For example, you could have one schedule starting at 22:00 (10 PM) on heat level 20, ending at 22:59, and another schedule starting at 23:00 at heat level 2. This way, you can preheat and then maintain the temperature.
  • 3Once you tap on “apply”, you will return to the previous screen and should be able to see your schedule. To completely remove a schedule, set the heat setting to 0 and tap “apply”. Repeat this process to remove any other schedules as well.
CONTROLLER LAYOUT AND FUNCTIONALITY

Once Setup is complete, your heated controller and app are completely linked.Any changes made to the controller will also update the app (and vice versa).

  • 1. The sentence you provided is already correct and doesn't require any corrections.
  • 2. This light signals that the schedules have been activated. When deactivated, this light will not be lit up. The temperature setting ranges from 1 to 20.
  • 3. Schedules can be activated or deactivated by holding down this button for 5 seconds. Holding it down for less than 5 seconds will display "S0" (not connected to Wi-Fi) or "S4" (connected to Wi-Fi). Please note: Schedules cannot be changed on the controller, only turned on and off. Changes must be made through the app.
  • 4. Increase or decrease the heat levels.
  • 5. Power on/off